


{Craft} Pretty Card and Cardholder from Specialty Cardstock
February 26, 2011 in All Posts, Celebrate, DIY

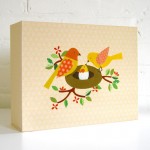
Here are the instructions for the card and cardholder we gave Hubby along with his specially gift-wrapped present.
Step 1:
Step 2:
Step 3:

Fold the remaining rectangular piece in half, then unfold. Fold in the bottom corners of the right side and the left side into a triangle. Open the triangles and then fold the corners a second time. Then cut a sliver of paper from the inside corners folded in towards each other and set one aside. Cut a vertical slit into both sides (pinch the paper and then just snip once with a pair of scissors) and insert the saved sliver of paper into the slits horizontally. Use tape to secure the paper strip if needed.
Step 4: After writing your message inside the card, insert the card into the cardholder and you’re finished!
![]()
Parents and friends: for more ideas, activities, and inspiration for #RaisingThinkingKids, click on an icon below to join us on Facebook, Pinterest, Google+ and Twitter.
Fellow bloggers: join me at Bloggy Law, where you’ll find Simple Tips for Bulletproofing Your Brand and Blog and I’ll help you navigate the social media legal landscape a little more smoothly.
Chrissy – who has written 426 posts on The Outlaw Mom® Blog - Creative Living in a Conventional World.


[…] also made Hubby this handmade card and cardholder from specialty […]