


{Bake} First Shot at the Cake Pop
March 29, 2011 in All Posts, Bake

Move over cupcakes, here come the cake pops!
I tasted my first moist bite of this confectionery craze at my dear friend C’s bachelorette party last year. Another friend of ours had commissioned naughty cake pops from Tracy’s Tiny Treats and “boy” were they tasty. Since then I’ve been dying to bake a batch myself.
The best (and prettiest) tutorials I’ve seen are Bakerella’s here (basic instructions) and here (Easter-themed pops).
Alisa Burke has a great tutorial here on Easter cake pops, too. Other delicious variations of this tasty treat are chocolate covered cake pops and Oreo pops from The Sweets Bar. And check out The Pioneer Woman’s technique for making her cake balls here.
Inspired, I baked these lovely springtime-themed pops last weekend:

 They were definitely yummy, and with some luck, I’ll have the technique down pat before mug cakes and jar cupcakes make cake pops seem so yesterday!
Here’s how I made these fun treats and some helpful hints for your first shot at the cake pop:
Ingredients/Materials
- box or homemade cake mix
- box or homemade frosting
- candy melts
- colored sanding sugar (or other decorative candy elements, food markers, etc.)
- lollipop sticks
- styrofoam blocks (optional)
Tip: Choose the shorter lollipop sticks (or cut yours in half), otherwise you’ll have a tiny ball sitting at the end of a long stick, which doesn’t really work aesthetically or in terms of balancing the pops in whatever display container you choose. Also, if you want your sprinkles or candy decorations to really “pop,” choose white candy melts for a bright, clean background.
Step 1 Bake the cake as directed on the box or per your recipe.
- Tip: Choose any flavor and any mix. I tried lemon cake with buttercream frosting for something zingy and fresh for spring.
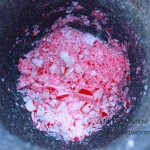
Step 2 After the cake has cooled, crumble it up and place it in a large mixing bowl.
- Tip: If a fork or spoon isn’t cutting it, you can use your clean hands.
Step 3 Mix in almost one can of frosting (or about 1.5 cups of your homemade recipe). Try my favorite buttercream frosting recipe if you want something really sweet!
- Tip: Make sure the cake crumbles are thoroughly coated with the frosting so the mixture is nice and moist. You don’t want the cake balls you make in Step 4 to come apart because they’re too dry and don’t hold together.

Step 4 Shape the cake/frosting mixture into balls. If you want to be precise, see here for a guide to measuring out the perfectly sized cake ball. Set the balls on a baking sheet covered with a sheet of wax or parchment paper.
- Tip: The smaller the ball, the easier it is to work with, but the bigger the ball, the more decorating space you’ll have - especially if you use food markers to draw on faces or other details.

Step 4 Melt a little bit of the candy melts in the microwave or a double boiler. Grab your lollipop sticks and dip one end of the sticks into the melted candy; then insert the dipped tips just under halfway into the cake balls and return the cake balls to the baking sheet.
- Tip: Make sure the tip of the lollipop stick is well-dipped so your ball doesn’t fall off the stick when it’s time to decorate.
Step 5 Refrigerate the cake balls until they’re nice and chilled (45 minutes - 1 hour). If you just can’t wait, throw them in the freezer for 15 minutes.
- Tip: Chilled cake balls are easier to work with and don’t fall apart as easily. A cooler ball will also help the melted candy dry faster.
Step 6 Dip the chilled cake pops in the melted candy. Use a rolling motion with your wrist to twist the cake ball into the candy melts instead of dragging it through.
- Tip: Don’t dip too forcefully or your pop will fall apart or fall into the candy melts. Also, if you can, use a double boiler instead of a microwave to get the candy melts as liquid-y as possible and keep the melted candy at an even temperature during the dipping process. This will help the cake pop glide more easily through the melted candy and will ensure that the candy coating is nice and smooth instead of thick and heavy (which is tasty, but not pretty).
Step 7 Sprinkle the sanding sugar over the not-yet-dried cake pops or press on any other decorative candies of your choosing. You can also paint your dry pops with corn syrup in patterns wherever you want the sugar or candy to stick or decorate them with food markers.
- Tip: Don’t roll the cake pops directly into the sanding sugar or you’ll get an opaque coating instead of a light, sprinkly effect.
Step 8 Set the cake pops to dry in a glass or vase or stick them into a styrofoam block.
- Tip: Keep in mind that if you let the pops dry on the baking sheet, they’ll suffer from a little “bed-head” and flatten on one side!
Happy baking!

![]()
Parents and friends: for more ideas, activities, and inspiration for #RaisingThinkingKids, click on an icon below to join us on Facebook, Pinterest, Google+ and Twitter.
Fellow bloggers: join me at Bloggy Law, where you’ll find Simple Tips for Bulletproofing Your Brand and Blog and I’ll help you navigate the social media legal landscape a little more smoothly.
Chrissy – who has written 426 posts on The Outlaw Mom® Blog - Creative Living in a Conventional World.


[…] my cake pop tutorial to combine your gingerbread cake and my favorite buttercream frosting (or any vanilla frosting) […]
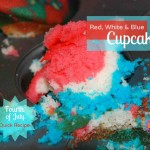
[…] this evening, you still have time to bake this patriotically pretty party treat - just follow my cake pop tutorial using red velvet cake, substitute white chocolate for the candy melts, and add some electric blue […]
[…] my cake pop tutorial here to form your cake balls and attach them to a lollipop stick, substituting the cake for brownies. […]
[…] a delicious bite-sized dessert with minimal effort by following my cake pop tutorial and tips here and here and simply topping your chilled cake balls with a dollop of my favorite buttercream […]
[…] Since my first shot at the cake pop, I’ve been busy trying to perfect my technique. I took my own advice on this attempt and chose white candy melts to make the spring confetti really pop. […]
Thanks for the reference in the blog! “BOY”, I had so much fun making the “naughty” pops for the bachelorette party! I just wanted to let you know that your spring cake pops are excellent and very colorful! Your tutorial is also great!. It just takes lots and lots of practice! (did I mention LOTS?)
Thanks again, and I LOVE your blog!
Tracy Schlereth
Tracy’s Tiny Treats
Cake pops and Cupcakes
[email protected]
PS. I’ve got the app too!
Thanks for visiting, Tracy! The “naughty” pops you made were so absolutely delicious and looked great, too! (I suppose that’s a weird thing to say about those shaped cake pops, but they really did look nice)
You inspired me to give it a try and I must say it is much more difficult than I thought. Will have to keep practicing until I can get them as moist and delicious as the ones you make and work on getting the decorating part down pat.
Looking forward to seeing and tasting your fabulous confections at Kathy’s wedding!
[…] my first shot at the cake pop, I’ve been busy trying to perfect my technique. I took my own advice on this attempt and […]
What a photo. Those look positively sinful, and far to easy to eat by the fistful.
The kiddos made getting to the fistfuls even easier by pulling the cake off of the sticks so we could just pop them straight into our mouths!
Thanks for visiting - love your blog, by the way! Great green tips
The Outlaw Mom
[…] This week I’m craving Bakerella’s Cake Pops book (for obvious reasons): […]
You are giving me some great spring/easter ideas to do with the kids! Love it!
Yay! We have to get started on our egg grass or we won’t get shoots before April 24th - will try to get it done this week and post about it soon!
Wow! You have time to make cake pops? They look awesome.
You gotta take time to make time! Ha ha. Actually, I don’t have the time. I have a secret new app that creates an extra two hours in my day - you have to get it. It’s called “Forget About Sleep.”