


{Craft} DIY Personalized Bottle Caps
March 5, 2012 in All Posts, DIY

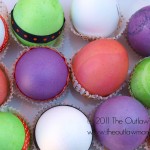
For Hubby’s recent 40th, the theme was Curry, Cake and a Keg. We had a keg of Sierra Nevada, lots of spicy Thai curries, and a special cake.

Hubby said he didn’t want any type of theme-y cutesiness, but I had to make something. So, I ended up making two things - homemade tile coasters (like these, but “manly” ones from black, grey and white striped tissue paper) and personalized bottle caps - and kept the rest of the decor subtle. Oh wait, I did also make wine and beer charms. More on that later!

Now here’s the simple tutorial!
Materials
- 1″ Bottle Caps
- 1″ Diameter Labels or pre-printed stickers
- 1″ Circle Epoxy Stickers
Step 1
Write, draw, or print your blank labels with your desired saying, image or design. You can also use any pre-printed stickers you buy at the store that will fit onto the top of the 1-inch bottlecap.
I chose the phrase, “Est. 1972” to tie into the drink theme and printed out my stickers using Avery’s online program.
Step 2
Place your sticker or label onto the bottlecap.
Step 3
Carefully peel off one epoxy sticker from the sheet and place it on top of the decorated bottlecap. Smooth the entire surface gently to make sure the epoxy has bonded with the decorated bottlecap. You’ll find there’s a teeny bit of give and you can pull the epoxy slighty in one direction if you didn’t place it exactly in the center of the cap. And when I say teeny, I really mean teeny teeny tiny.

I tried different methods, like putting one side down first and smoothing to the opposite side and coming at the bottlecap from an angle, but the best way ended up being trying to eyeball it from directly on top of the bottlecap and going for it dead on. It’s a little tricky, but since you buy everything in bulk, you’ll have lots of product to practice with!
Tip: Make sure not to touch the sticky side of the epoxy sticker or you’ll end up with fingerprint smudges.
Are these not the coolest things ever?
I’d love to use my leftover materials for my crafting and for learning activities for the kids. I had no idea bottlecap jewelry was a “thing,” but I guess you could do that, too. And a friend at the party suggested actually using the bottle caps … like bottle caps… to personalize your home brewed bottles. Hope you have fun with this and let me know if you try it!
Happy Crafting!
![]()
Parents and friends: for more ideas, activities, and inspiration for #RaisingThinkingKids, click on an icon below to join us on Facebook, Pinterest, Google+ and Twitter.
Fellow bloggers: join me at Bloggy Law, where you’ll find Simple Tips for Bulletproofing Your Brand and Blog and I’ll help you navigate the social media legal landscape a little more smoothly.
Chrissy – who has written 426 posts on The Outlaw Mom® Blog - Creative Living in a Conventional World.


[…] and picked them up for future crafting. I also had leftover circle labels from making the DIY Personalized Bottle Caps. With leftover flower wire from this project, the idea for this project came together like […]
[…] is one of the easiest, cheapest projects I’ve made, and one of my favorites. Well, besides these DIY Personalized Bottle Caps I also made for the party. (Okay, and the homemade wine and beer charms I’m posting about […]
These are so cute! I’ve been saving bottle caps for no reason, other than waiting for a cute craft project to come along
They’re so easy. I wish my son were older because I don’t think we can do a kid craft with them since he’s liable to swallow a few I bet there are larger epoxy stickers I could use on larger caps, though. Can’t wait to see what you come up with.
What a great idea!!! When I first saw the title, I tried to imagine how you crimped the edges of every one of those bottle cap discs. Also- I got my elmer’s package! We must have had it awhile- My husband had it mixed in with all his ebay packages! We found it yesterday!!!! Thank you!!!
Awesome! Glad you got it! Okay, now I’ll be waiting for those fun posts with what you do with everything